
Large-Format Image-Field Exposure Measurement
Integrated or Spot Readings?
by Carl Koch

Exposure measurement in the image plane of the camera is by now generally accepted as being superior to the use of external exposure meters – as evidenced by the current trend in camera design. The question however arises, whether such image plane measurement should integrate the whole picture area or be based on selected spot readings – and in what way the two methods differ.
The question itself is an old one. It arose indeed already with reflected light readings with separate exposure meters – and was often settled almost subconsciously in favour of spot or small-area readings. The expert habitually takes close-up readings of difficult subjects, while equipment manufacturers have made his job easier by developing exposure meters with ever smaller acceptance angles.
The introduction of image-field measurement revived the controversy over integrating versus smallarea readings in a form which is particularly significant for large-format cameras. This is because image-plane measurements correspond to reflected light readings and are subject to all the sources of error associated with this method. With a hand camera, as with a separate exposure meter, close-up readings can be used to measure selected subject areas. With a large-format view camera tied to its tripod or stand this possibility disappears.
These then are the technical circumstances. It follows that with a large-size view camera we cannot rely on an integrated image plane measurement. The requirements for image-plane measurement in a large camera are only satisfied by reading the brightness of individual selected image portions. This is easiest if the reading area is small compared with the format size; the measuring cell should not only be small but freely movable in the image area.
Most photographers are familiar with the sources of error in integrated readings. Nevertheless these sources and the limitations of this method are briefly summed up below.
Integrating readings are misleading when:
- (a) light and dark image portions in the field taken in by the exposure meter are not balanced in area (for example with an excessively large light background};
- (b) light and dark portions of the field taken in by the exposure meter are balanced in area, but not in brightness (for example predominant light tones such as a landscape with 50 per cent sky and 50 per cent bright meadow, snowscapes, distant views – or predominant dark tones such as scenes in the shade and under trees, etc.).
With integrating readings these conditions are responsible for most of the well-known factors of uncertainty, however accurate the exposure meter itself may be.
A further difficulty of integrating reflected light readings (and also incident light measurement) arises from disregarding the second most important
factor of correct exposure, namely the brightness range of the subject.
It is common knowledge that determining the correct exposure becomes more difficult, the greater the brightness range to be covered. Conversely, the more precisely the brightness range is taken into consideration, the more accurate and correct will be the exposure. This fact may not be particularly important for the amateur, but it is vital for the professional photographer concerned with optimum image quality.
Integrating measurement is therefore subject to a serious limitation in efficiency, analogous to that of a camera without movements. To overcome these limitations we need a new approach to our tools. Every professional must however realise that acquiring an exposure meter for spot readings is not in itself a guarantee of improved efficiency. As in the use of the camera, the results depend on his own technique and on his readiness to accept new methods. These are not complicated, though they may at first be unfamiliar.
Improving the measuring efficiency involves the application of sensitometric principles to measuring technique. This is less impressive than it sounds; it is analogous to changing over from a shot gun (integrating readings) to a rifle (spot readings) – in other words to precision aiming.
This is what it implies in practical terms:

The subject normally consists of tones of different brightnesses, represented in Fig. 1 in terms of a grey scale.
A narrow-angle exposure meter is still calibrated for a medium tone value. Any individually measured area – whether it is a white or a black tone – will, if exposed according to the reading, yield a medium grey. Except for special effects such a tone reproduction is however not desirable. So it is up to the photographer to choose that part of the subject which he wants to reproduce in the final picture as a tone of medium brightness.
This brings us to the significant feature of exposure readings based on applied sensitometry. The practical procedure is to determine a specific subject portion which is to reproduce in the picture as a medium brightness. (We shall refer to this as a RAPID reading.) The selected portion will then really reproduce as a medium tone value, irrespective of the brightness and area distribution of the tones in the subject. This is the significant advantage of this way of taking measurements.

Fig. 2 shows an example. The foreground of the scene contains only medium tones and the background is bright sky. An integrating reading would here give a wrong result (case b). A spot reading in the image plane however measures the exact image portion which is to be a medium tone in the resulting picture. Moreover, measurement in the image plane is equally easy with distant or with near subjects. With a little practice, making such readings takes no more time than pointing a separate exposure meter, but is more reliable because we have determined exactly a medium subject tone before taking the reading. This tone is then reproduced as a medium grey also in the picture.
Obviously such a precisely aimed reading is superior to an intergrated whole-area measurement in cases (a) and (b). It depends of course on an accurate assessment of the subject. However, as all experts in exposure measurement are agreed, without such assessment no significant advance in exposure technique is possible.
In essence the new method therefore involves specific measurement based on study of the subject, instead of aimless pointing of the exposure meter. This technique of selected RAPID readings however by no means exhausts the possibilities of individual image plane measurements based on applied sensitometry. Strictly it is only the first step to efficiency in the described exposure technique.
With individual readings in the image plane it also becomes possible to determine the brightness of specific subject portions and hence the brightness range of the image. For this purpose the exposure meter must have a relatively small measuring area which can be moved and visually located anywhere in the picture area. A spot-reading exposure meter therefore also indicates the second more important parameter next to sensitivity and thus attains a similar significance to the densitometer in evaluating negatives. The procedure is quite simple.
In the case of the well-known SINARSIX meter the two measured extreme highlight and shadow values are transferred to a scale which automatically shows:
- brightness ranges from 1: 4 to 1: 250;
- a corresponding mean exposure value.
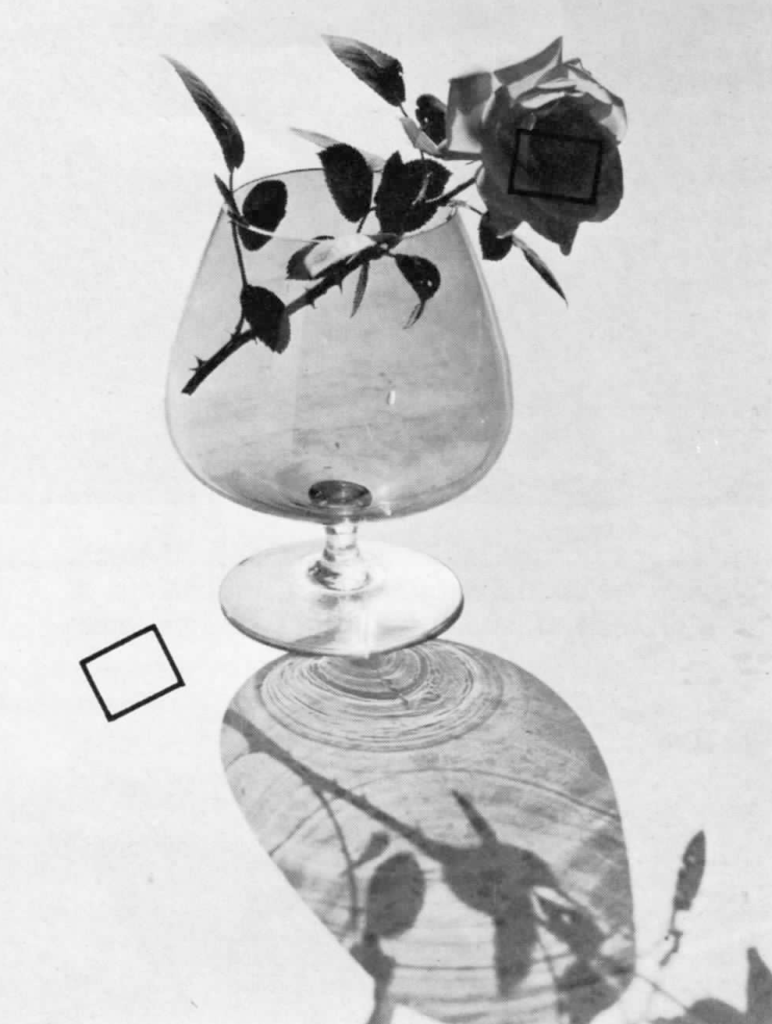
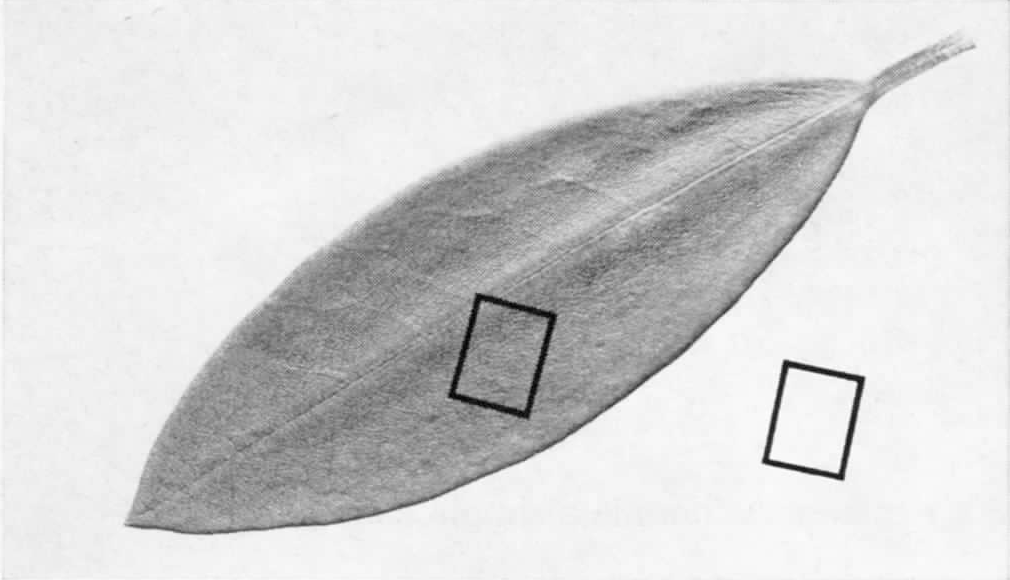
Fig. 3 shows a subject which calls for measurement of brightness range. Visually this is almost impossible to estimate. Only individual two-point readings with an exposure meter in the image plane provide the necessary information.
The same system can also be used in reverse. We can preselect the required brightness range (for instance on the scale of the SINARSIX) and we then have the limiting values for the brightest highlights and the darkest shadows. Then it becomes a comparatively simple matter to adjust the lighting balance of the subject accordingly. The improved quality of an exposure with such a controlled brightness range becomes immediately apparent.
This technique with individual readings however not only permits accurate exposure measurement and determination of the brightness range for precise matching of the subject conditions to the sensitive emulsion employed. The possibilities of precise control can also be utilised for specific effects with deliberate modification of tone values. This is still an almost virgin field; the immediate exploitation of the possibilities of a new technique has – as in many other cases – proved to be rather limited.
Colour was an example of such a development. Originally everybody aimed exclusively at correct reproduction. Today colour has been recognised and applied as a creative medium; a classic example is Rene Groebli’s book «Variation».
This applies equally to the other elements of photographic expression – illumination, perspective, differential sharpness and grain. So why should not exposure become a means of achieving pictorial effects? Measurements based on applied sensitometry here offer further and highly interesting possibilities which incidentally have been applied for some considerable time in motion pictures.
For explanation here is a simple example.
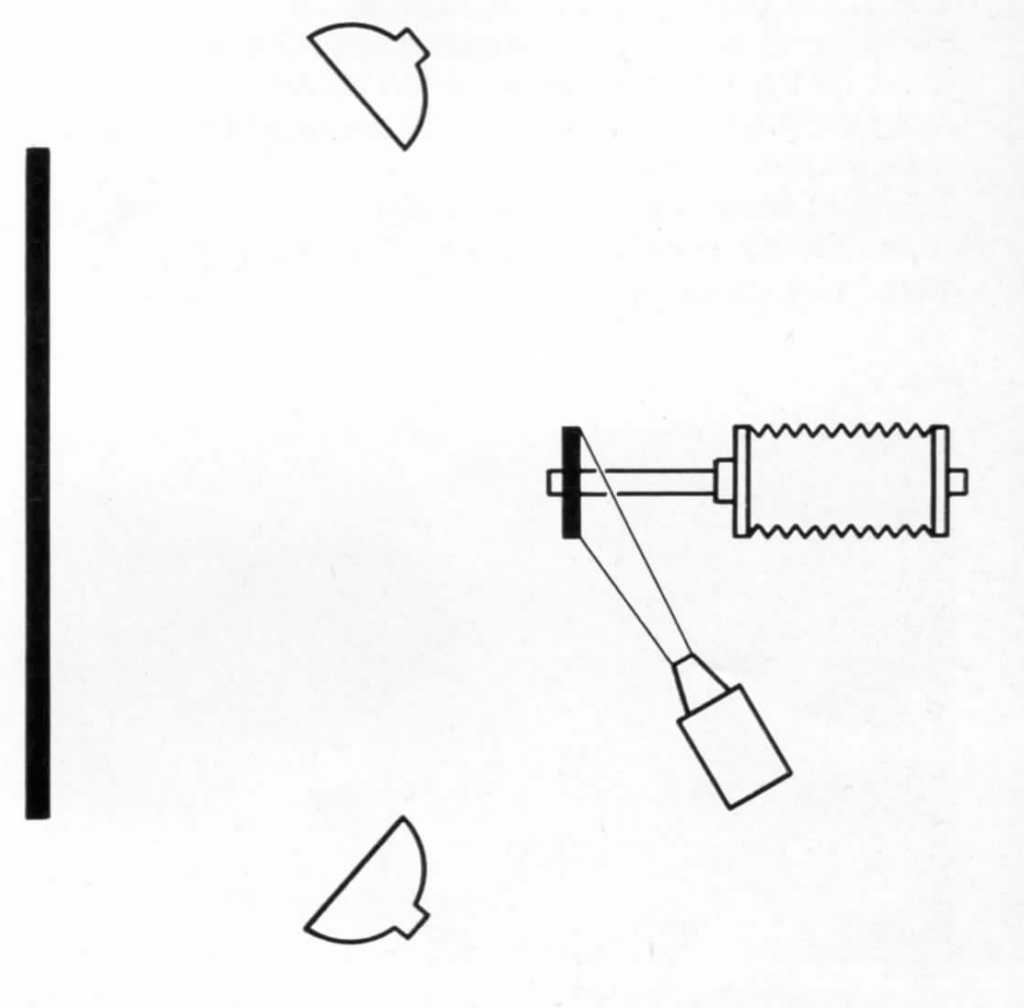
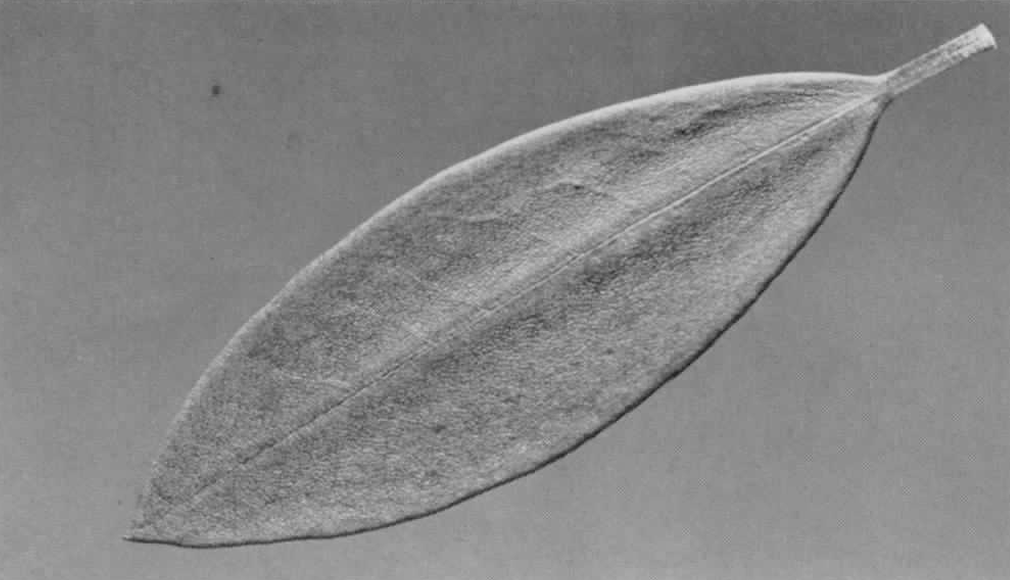
Fig. 4 shows a camera set-up. The foreground object is a green leaf between two glass plates in the auxiliary frame, photographed in close-up at same size (1 :1); the background is a white projection screen. The foreground and background are lit separately.
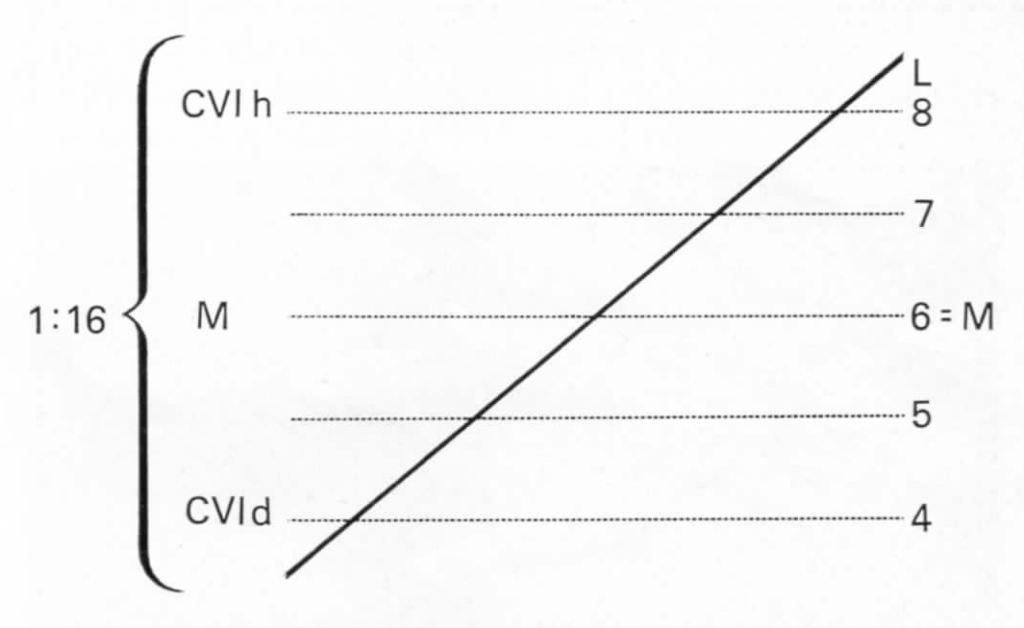
The characteristic curve of the taking material is shown in simplified form in Fig. 5.
M = medium brightness value (and calibration value of the exposure meter)
CVlh (bright) = highlight limit of brightness range
CVld (dark) = shadow limit of brightness range
L = assumed medium light (exposure) value = 6. The other figures are corresponding values related to the brightness range. The available brightness range is thus taken as four light value steps, i.e. 1: 16.
This is the problem: The leaf is to reproduce grey, the background white. The measured light and exposure value for the leaf was, as assumed above, L = 6. What must be the measured light value on the background to record white?
Solution: Measure the background brightness and adjust the illumination on it until the exposure meter indicates a light value of 8.
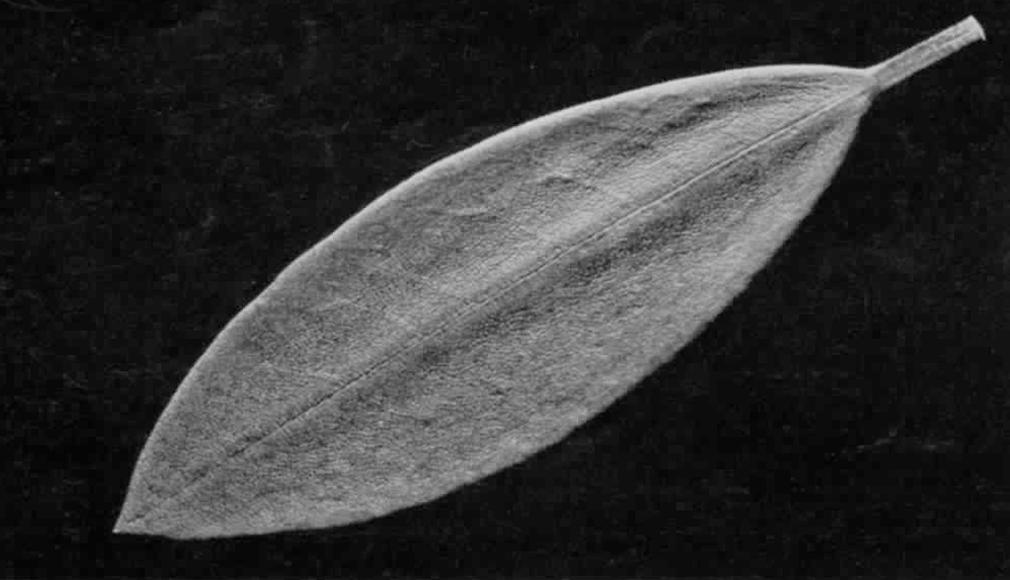
The leaf is again grey, the background also is grey. A reading of the leaf again gives a value of 6 for L. What must be the measured light value of the background to make it really reproduce as grey?
Solution: Adjust the lighting on the background until the exposure meter shows a light (exposure) value of L = 6.
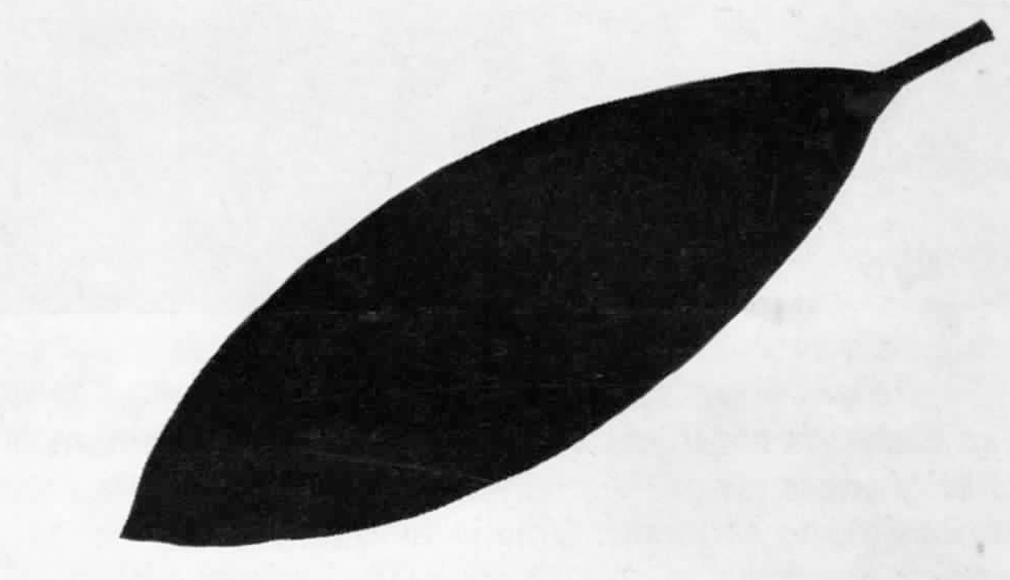
The leaf is once more grey, the background black. A reading on the leaf again gives a light (exposure) value of L = 6.
What must be the measured light value of the background to make it record black?
Solution: Adjust the background illumination until the exposure meter indicate·s a light value of L = 4.
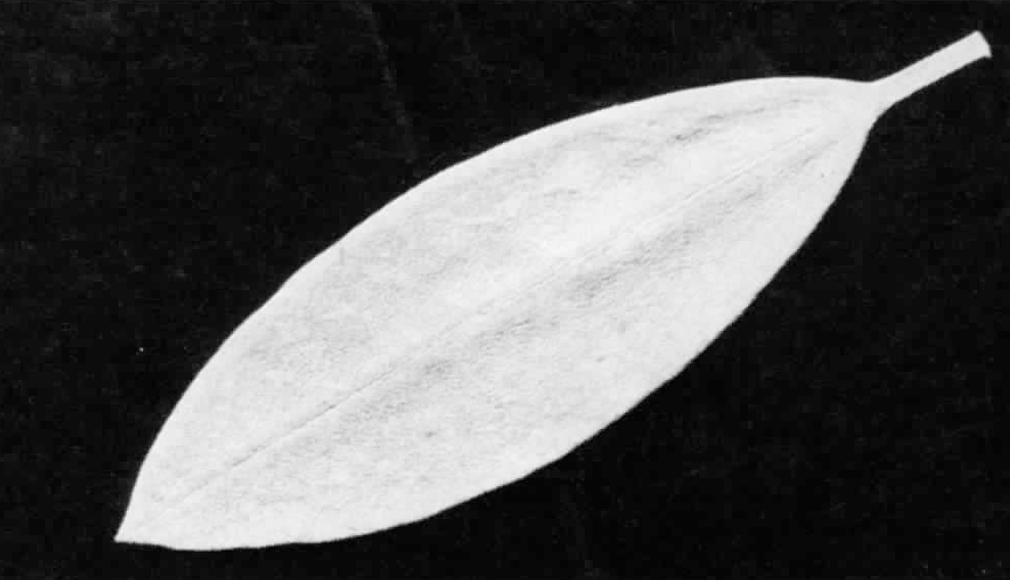
The leaf is to record white, the background black.
Solution: Adjust the lighting to obtain readings of L = 8 on the leaf, and L = 4 on the background.
Problem: Black leaf, white background.
Solution: Adjust the lighting for a reading of L = 4 on the leaf, and L = 8 on the background.
That is really all there is to applied sensitometry in exposure measurement. Yet this technique can achieve surprising effects. Best of all, try it yourself.
It offers the professional photographer new scope for creative possibilities which only need to be utilised.
A few further control possibilities: high-key and low-key effects – even both in the same picture. (High-key implies a brightness range of1:2 to 1:4 confined to the upper part of the characteristic curve; low-key corresponds to a similar brightness range in the lower part.)
For the expert who wants to get more out of exposure measurements this also plainly answers the question whether to use integrated or spot exposure readings.