Contrast control in practice


For the ultimate image


Fundamentals

A joint study by Black Box Corporation of Pittsburgh, Quadgraphics of Pewaukee, both in the USA, and by SINAR AG SCHAFFHAUSEN, Switzerland, finally looked at a major question in SINAR Information No. 30: It analysed in detail how photographic image criteria relate to litho production and offset printing. One conclusion was that for best results in print the image brightness range, as measured in the camera’s film plane, should not exceed the equivalent of four f-stops.
Keeping within this limit offers important benefits:
- The photographs reproduce better in print
- You get fewer complaints and less friction between the client, printer, lithographer, art director and photographer
- Thanks to increased exposure latitude you need no bracketing exposures.
Not surprisingly printers, lithographers, art directors and clients are increasingly concerned that photographers should keep to these brightness range limits. Agreeing on such guidelines eliminates most problems when the pictures are delivered for the process work. Here, too, communication counts – the photographer and the lithographer or customer must each know what the other is up against.
The aim of this Information is to show ways of measuring and controlling the subject brightness range and contrast in view camera photography.

Image tone values

As measured in the film plane, the image contrast between lightest and darkest significant detail should thus not exceed four f-stops. We can then base our procedures on the scale above.
We can regard this as a kind of zone system for colour photography (with apologies to Ansel Adams). In view camera photography it refers to the most widely used colour reversal films- Ektachrome 64 Daylight, Agfachrome 50 RS, Fujichrome 50 RFP Daylight. Once you memorise this scale you are no longer restricted to basing exposures on midtone readings – you can rely more and more on exposing for subject tones anywhere in the range.
If the contrast in the image plane exceeds four f-stops, there are various ways of reducing the range. Depending on the subject, you can:
- modify the lighting (softer general illumination, fill-in light for shadows);
- modify the subject (making surfaces more – or less – reflective);
- sacrifice detail in specific subject portions; or
- use other means such as films or softer gradation (e.g. colour negative material instead of transparency film), graduated or special effects filters, prefog the film by an exposure through a diffusing filter, or overexpose (by not more than 2/a stop) and reduce the first development time of E6 processing (but this risks colour shifts).

Practical examples

Photographer Dennis Savini working in Zurich, Switzerland, notes:
“I have been using spot exposure readings in the film plane for some six years – at first with the PROFl-select TTL, for the last four years with the SINARSIX-digital, Module 2 and SINAR DIGITAL shutter, and more recently also with the SINAR booster 1. That opened my eyes to what the film can do and what I can do with it. This reliance has made me more creative – but my bread-and-butter assignments have also benefitted.
A selection of examples will show how this has worked out. In all cases I start with a preconceived pictorial idea. Sometimes I formulate it beforehand, or it may emerge in the course of visualisation.
For the final exposure I record the film plane meter readings-either on an instant-picture print or on an over/a y over the transparency. When I deliver the job to the client these data tell the lithographer everything he needs to know – the best guarantee for perfect reproduction in print.”


For the ultimate image

High-contrast

This covers situations of evenly distributed tones from bright to dark, but with the contrast in the film plane in excess of four f-stops.
Cutlery and black plate
(cover picture)
5×7″ SINAR p / 480 mm Apo Ronar lens I Ektachrome 64 Professional Daylight film I Bellows hood mask 2 / Minolta Flashmeter IV and SINAR booster 1 / 16 sec at f/22 2/3
Approach and lighting
“Photographers usually like contrast. With some subjects that can become a challenge, as in this still life. Here a correct texture rendering involves making the most of the tone range – from the shiny metal to the deep black plate, yet with full gradation in the significant shapes and detail. I used two lamps, pointed at the subject through matt opal diffusers. The first lamp provided the reflections I wanted along the plate edge and- at a relatively bright level- the necessary metallic catchlights (+6). The second lamp generated the rounded reflections and modelling inside the spoon. With the aid of repeated readings I reduced its intensity to obtain full highlight detail (+2). The other reflections were derived from various silvered white, grey and black cards that I arranged around the subject. A yellow neon tube gave the setup a modernistic touch.
Meter readings
Thanks to TTL readings I managed to keep the subject brigthness range fully under control. To start with, I used the accurate Minolta Flashmeter IV and the new SINAR booster 1 to monitor the catchlights and their reflections in the material. These check readings permitted careful and precise control of the tone values.
This also shows that the aim of contrast control with TTL spot readings in the film plane is not necessarily soft lighting to keep all tone values within the range of four f-stops for trouble-free reproduction. Materials such as metal and black china demand vigorous reproduction of a full tone range. The rendering of the material texture depends on the catch/ights in the cutlery and the deep black plate areas. But by monitoring the brightness range we can maintain detail in the significant subject portions. (With some subjects it is possible to restrict the brightness range by toning down white areas by airbrushing or by painting blacks dark grey.)
The cover picture was a multiple exposure. The two significant reading points (for twopoint contrast measurement) with the meter probe outline and the lettering on the ground glass were superimposed by successive separate exposures.”


For the ultimate image


High Key

This covers scenes of predominantly light tones.
Aperitive still life
4×5″ SINAR p / 300 mm Sironar-N DB lens/ Ektachrome 64 Daylight film/ Bellows hood mask 2 / SINARSIX-digital, Module 2 and SINAR DIGITAL shutter/ 1/30 sec at f/22 2/3

Approach and lighting
“I was asked to photograph a refreshing Campari still life for an advertising agency presentation. I had to show the specified items in the picture but otherwise had a free hand. I tackled this by setting up eve,ything on a chrome-plated metal sheet. Back lighting through an opal diffuser provided the sheen, drops of water applied at various points enhanced the effect of freshness. One problem was correct balance between the back lighting and fill-in. The back light was clearly the main source, graduated from brilliant white to very pale grey. Yet the lighting had to preserve the delicate glass and metal outlines against the background. The fill-in light was to provide modelling to the labels and oranges but had to remain subdued. I set up the bellows hood 2 and precisely adjusted its blinds to the image edges.

Meter readings
I balanced the lighting with the SINARSIX-digital. On the brightness scale I assigned +3 to brilliant white. Then I controlled the tone graduation by slight adjustments of the lamp behind the opal diffuser until I had the meter readings I wanted -from +3 in the background to + 1 2/3 in the foreground. The fill-in light at the front left I controlled to render the label correctly at the left, darkening by 1 f-stop to the right. That provided pleasantly rounded modelling.
After the first Polaroid test I still had to apply matt spray to some of the glass edges to make them show up against the metal background. The final transparency precisely conveyed my intention.”


For the ultimate image


High Key

This covers scenes of predominantly dark tones.
Sports car
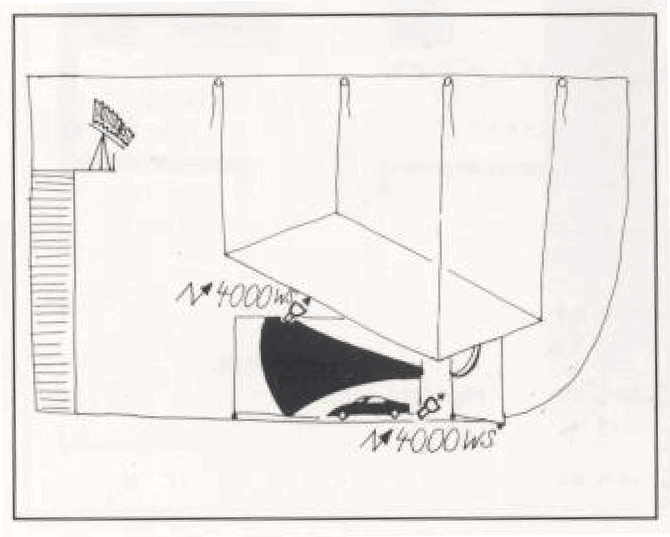
13×18 cm SINAR p / 480 mm Apo Ronar DB lens/ Ektachrome 64 Daylight film I Bellows hood mask 2 / SINARSIX-dig1tal, Module 2 and SINAR DIGITAL shutter/ 80 sec at 1/22 and 20 flashes

Approach and lighting
“I am not an automobile freak, but I love good looking cars – even if I have no ambition to roar through the streets in them.
An advertising campaign called for a subject that would look good in low light, so I chose this exclusive masterpiece of automotive engineering. I wanted to make the most of the deep black bodywork and therefore cut down the lighting to a few attractive reflections to pick out the shape. It became a process of progressive reduction until we were left with the bare essentials. The illumination came from just two indirect flashes of 3200 watt-sec each. A fluorescent tube lit up the interior.

Meter readings
With this complex shiny body of the Ferrari’s black finish the reflections needed particularly careful balancing to keep the bnghtness range under control.
The lightest highlights measured in the reflections still had to show detail (+1 2/3), the sheen outlining the body shape towards the edges also had to retain detail (0). The side of the front could be somewhat lighter (+ 1) but not as light as the catchlights on the top of the bodywork. The interior lighting (an ambient artificial light reading) had to appear brilliant but without loss of highlight detail(+ 1 = 80 sec, with automatic reciprocity failure correction).
It was a fascinating but far from simple Job to model a shiny black rounded body without all-over diffused lighting. Here traditional incident-light readings don’t get you anywhere, and reflected light readings from anywhere other than the camera position are subject to serious error. Spot readings in the film plane were an immense help. “



For the ultimate image


Mixed-light

This covers setups where additional light sources, for instance flash, supplement ambient light to reduce an excessive brightness range or to provide pictorial effects. The two types of lighting not only illuminate separate parts of the scene but also interact.

Industrial plant
SINAR traditional 4×5″ / 75 mm Grandagon lens / Agfachrome R100S film / Bellows hood mask 1 / PROFl-select TTL/ 4 sec at f/16

Approach and lighting
“My rendering of interiors tends to convey the first impression they make on me. I try to use ambient light whenever I can, especially when it is as attractive as in this location.

Approach and lighting
After setting up the camera and arranging the image on the ground glass screen I used my PROFl-select TTL for two-point readings in the upper and lower portions of the plant. The lower part turned out to be appreciably darker than expected. To maintain detail at the top I needed massive fill-In lighting at the bottom – achieved with carefully placed flashes. Now I could adjust the flash intensity to match the required aperture. The ambient-light exposure time controlled the detail in the upper part. The ingenious mixed-light program of the SINARSIX-digital with the Module 2 and SINAR DIGITAL shutter elegantly and precisely copes with such problems.
For this shot, spot readings in the film plane showed up the real difference in lighting level between the upper and lower image sections. I was able to balance the different light sources accurately by flash and ambient light readings. At times I deliberately expose large industrial subjects for a lighter overall effect, even at the cost of sacrificing some highlight detail. The resulting bright and airy impression matches our experience of the space better than a somewhat darker exposure based on midtone readings. “


For the ultimate image


Taking materials
4×5″ SINAR p / 75 mm Super Angulon lens/ 8 sec at f/11 plus flash
Moon: 480 mm Apo Ronar lens / 1/20 sec at f/8
SINARSIX-digital-Module 2-SINAR DIGITAL shutter

Approach and lighting
“I had long been intrigued by the challenge of setting up a romantic evening scene by moonlight, with a flash-lit interior. One day I got the chance to do it. A search turned up a suitable roof terrace and a couple ready to cooperate. The flowers and champagne were both props and a sign of appreciation. After minor modifications on the roof I could get going – and time was short. I had to put the mood across by mixed lighting and the willing help of the subjects.

Meter readings
The fast changing evening light out of doors is a problem for a photographer used to predictable studio conditions. So it is a great help to be able to locate and accurately measure all the light sources from behind the camera with the SINARSIX-DIGITAL.
First I settled on a working apetture to yield the required depth of field. This determines all the other settings. Then I concentrated on the impottant image tones. The interior had to be light (+2), the sky deep blue (-1 1/2); except for the table with the flowers the terrace could be black (-3). I superimposed the moon by a second exposure late at night on the way home – to quote Ansel Adams: 1/30 sec at f/8 for a full moon on a clear night
you need no meter for that.
I let the various light sources inside (the candles, a fluorescent tube and a tungsten halogen spot) contribute their share but controlled their effect by turning them off at different times – something of an athletic feat for my assistant. On the terrace itself I installed a small flash (Nikon SB 15) inside an opal glass sphere and fired it from the camera.
The SINARSIX-DIGITAL and Module 2 with its mixed-light program reliably matched all these factors and helped me to catch the right moment for the best outdoor illumination.”


For the ultimate image


The exposure metering system

The procedures described above for controlling tone values depend on precise spot readings in the film plane to measure the exact light intensity reaching the film. Before that you had to proceed by trial and error and rely on experience to reduce wasted exposures. Or the frustrated photographer could only complain that “the others” (usually the lithographer and printer) had made a mess of his pictures in reproduction.
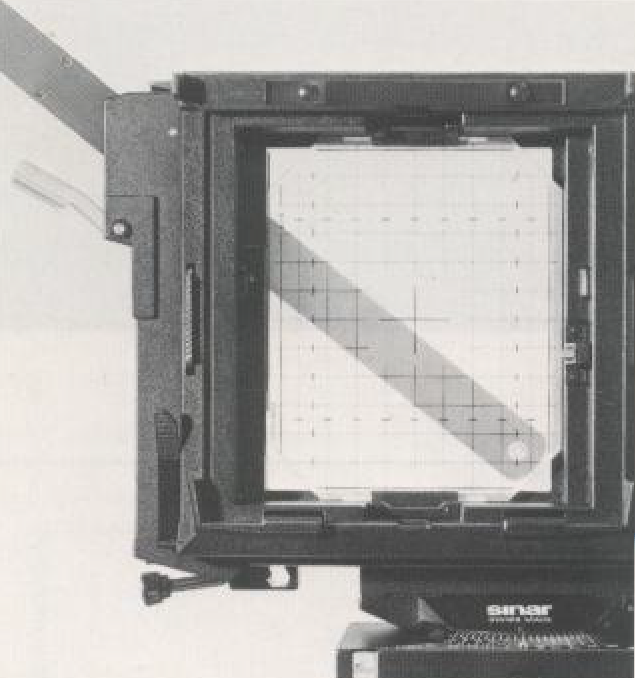
A meter probe serves for the light readings. On the SINAR metering back it is moved directly into the image plane in front of the ground glass screen. You can precisely locate the small 3×4 mm target in the metering window.
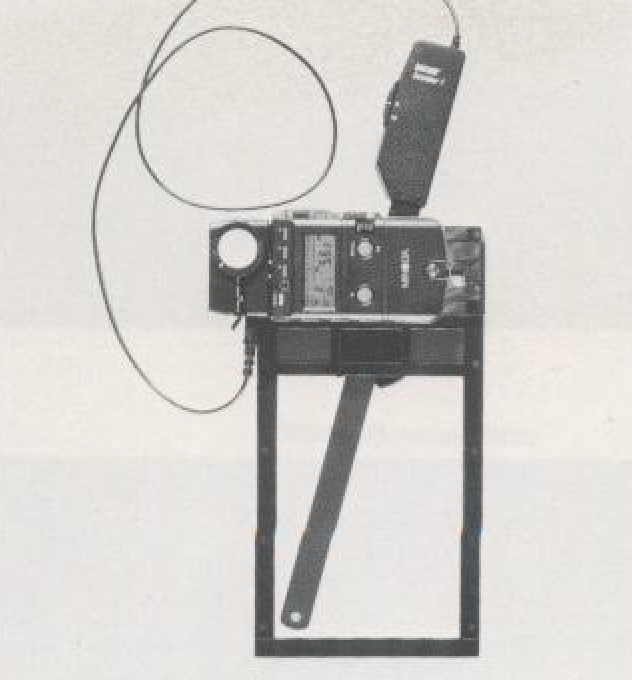
With the aid of the light meter cassette you can use the same metering equipment on any other view camera not equipped with a metering back. As shown below, the SINAR booster 1 probe with the Minolta Flash meter IV (also compatible with the Flash meter III) fits the light meter cassette. You then push that into the standard international back like a sheet film holder.
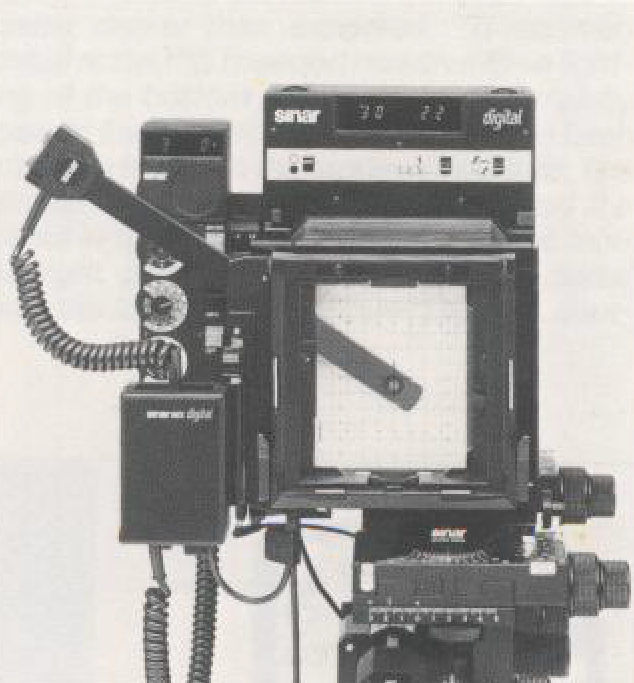
The most sophisticated exposure control and shutter system consists of the SINARSIX-DIGITAL, the Module 2 and the SINAR DIGITAL shutter. This is tailored to SINAR cameras for largely automated operation. Unlike manual metering probes, It also provides full mixed-light control and automatic reciprocity correction at long exposure times. For detailed infonmation see the “SINAR exposure meters” and “SINAR booster 1” brochures and the relevant instruction manuals. At its works training centre SINAR also organises 4-day workshops for small groups. Workshop 2 specially deals with exposure measurement.



SINAR AG SCHAFFHAUSEN, Stadtweg 24, CH-8245 Feuerthalen, Switzerland. Telephone (053) 29 35 35; Telex 897106 sina ch; Telefax 41 53 29 35 78

Printed in Switzerland- May 1988. 282.86/05.040.025 e
Copyright 1988, including all translations, by SINAR AG SCHAFFHAUSEN, CH-8245 Feuerthalen, Switzerland.
We are specially grateful to Dennis Savini and his team for their collaboration. The four colour separations for this Information were recorded by Quad Graphics, Pewaukee, Wisconsin, USA, in a standard full scanning run without compression. This saved 50% in time and 41 % in cost.


